


For help with STRIP or INDIVIDUAL LASHES, please visit our Frequently Asked LASH Questions Page.
How To Apply FALSE EYELASHES tutorial:
Pro-Tips False Lashes Do's & Don'ts:
----------------------------------------------
----------------------------------------------
How to wear false eyelashes: Step-by-step guide to apply falsies perfectly to glam up your eyes!
Follow this simple step by step guide for easy eyelash application. Putting on and removing false eyelashes has never been so easy. Just follow the eight-step makeup tutorial below for perfect false lashes for all occasions each time.
Making your eyes pop and stand out is as easy just putting on a dash of mascara. Another popular and effective way is to reach for a pair of false eyelashes for added drama. If wearing falsies has crossed your mind but thought it might be a difficult task to do then we are here to help you with the application of falsies with a step by step guide. With this you will not have to worry about putting the, on the wrong way.
- The first thing you want to do is to make your lashes look as natural as possible. Trimming down your falsies so they blend in a bit more seamlessly with your natural lashes is vital. You don't want your lashes looking fake. Measure them by placing them on your eyelid above the lash line and trim the false lash where it is too long. This will give you a more natural look.
- Use an eye primer over your eyelids. Define your eyes using some kohl and then proceed with the application of eyeshadow. You need to get your basic eye makeup done (except mascara and eyeliner) before applying the fake lashes.
- Use a small brush or an applicator to take adhesive out and also apply it to the outer seam of the falsie
- Standing in front of a mirror put the false eyelash strip on your eyelid in a way that is close to your natural lash line. Make sure to place it as close as you can to your lash line, beginning from the outer corner of your eyes. Try to make sure you do not place the inner corner part of the falsie too close to the tear duct so you do not make your eyes look too narrow.
- Give the adhesive time to dry naturally. If in case you end up getting glue in your eyes, make sure to rinse it out asap with warm water. Or you can also give self adhesive falsies a try as well.
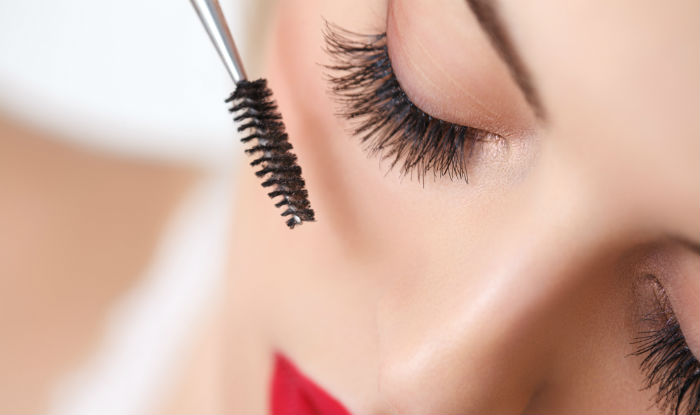
- Mascara can really help in having you false lashes blend in with your natural lashes. Carefully apply the mascara to fill your real lashes to achieve a more natural look.
- Filling the gap between your falsies and natural lashes can be done easily with liquid eyeliner. When you apply liquid eye liner your real lashes get filled for a more natural look.
- Removing you false lashes is not a difficult task. Simply use makeup remover to clean off the lash adhesive. Make sure to clean your falsies really good and properly store them for reuse.
Pro Trick To Make Your False Lashes Last Longer than Ever!
Depending on what you're going for, you can find a perfectly good set of false eyelashes for daily wear at great deal at your local drugstore, or shell out for more for professional designed Studio Effects Lashes for special occasions your favorite reality TV star swears by. The decision to save or to splurge is up to you, but if you choose the higher-priced road, you can still get the most bang for your buck. It's all in how you care for the lashes after each wear.
"I completely believe spending money on quality lashes is worth it and really cost-effective in the long run," Kattan (vlogger) wrote on her website. “But they're only cost-effective if you know how to take care of them properly." And that's where this step-by-step video of the thorough but gentle method she uses to keep her lashes looking as good as new for up to 20 wears.
The best part? Everything you need is probably already in your bathroom cabinet — except, of course, for patience. You're going to need plenty of that.
Other Helpful How to Apply / Put Them On Instructions
Decide on Your Desired Look
For a sexy, sultry look, ideal for that New Year’s Bash, use longer length individual lashes like Ardell’s Duralash Flare in Long Black or Brown across the lash line and cluster three longer individual lashes at the outer corner. It’s important to always put the longest lashes on the outside edge to lift and elongate the eye. Sometimes just two or three clusters at the outer corners are all you need to look stunning.
For a less dramatic look, such as the company holiday party or get-togethers with friends, use Ardell’s Duralash Naturals in Short Black or Brown and apply just a few shorter individual lashes to the outside corner of your eye.
Apply Lashes
When applying individual lashes, do so after putting on any face or eye makeup. Lashes are like your evening coat – the last thing you put on before heading out the door.
First apply a thin line of black eyeliner to your upper lid, right over your natural lashes. This ensures that skin doesn't show between your real lash line and the false lashes. Then apply mascara to your natural lashes before applying false lashes. This will help the false lashes adhere better andmix in with your natural lashes.
Squeeze a tiny drop of Ardell Lashtite Adhesive (specifically designed for use with individual lashes) onto foil or a disposable plastic plate, dipping the tip of each lash into the glue. Let the glue dry for a minute before applying. This trick allows the glue time to get tacky for better adhesion.
Use tweezers to pick up a single lash and lay it on the lid
at your natural lash line. Insert individual lashes between
your natural lashes spacing them a little less than 1/4"
apart, starting at the outer corner of your eye and working
inward, to the middle of the eye. Let lashes set for a couple
minutes. Continue this step until you achieve the desired
affect. Apply another coat of mascara to blend the false lashes
with your own.
Applying False Lashes:
How To Apply False Eyelashes: Make sure all oil is off your
eyelids. I suggest using a Toner-Astringent with a tissue
or thin washcloth to remove all oils. Then curl your own lashes.
This will allow your own lashes to blend in with the false
ones when applied. Next mascara your natural eyelashes (top
and bottom) before applying the false ones, and they will
blend in and look more natural. Apply false eyelashes after
reading how below. No need to mascara the false eyelashes,
but you may, if you wish...but just a little on the tip ends.
Trimming Eyelashes To Fit Your Eyes: To be sure the false
eyelashes will feel comfortable on your eyelids, place each
lash on a lid (without glue) to see if the strip might be
too wide. I always have to trim mine a little. Snip just a
few hairs at a time until you have the correct width that
is shorter than your own eye width and feels comfortable.
Next, your natural eyelashes are shaped like this.
The false eyelash is shaped like this.
So trim the hair shorter toward your eye and also taper the outside few hairs shorter to give a more natural look. You will most likely want to trim the rest of the lash a little shorter in general.
IMPORTANT: When trimming, don’t cut the lashes straight across. Point the scissors into the lash and make a number of snips. This will create a slightly uneven, more natural appearance.
IF LASHES ARE TOO WIDE FOR YOUR EYES: Lift one eyelash out of the box. Holding it with both hands at the ends of the lashes, place it up to your eyelids next to your own lashes. You will most likely find the eyelashes are too wide for your eyes. (I always have to trim the width slightly.) Snip off a few hairs at one end and test it again. It is important not to have the false lashes too wide because the ends will stick into the eyelid and feel very uncomfortable …most irritating! When cut and applied correctly, you will not even know you have them on. Now trim the other one to match.
IF THE LENGTH OF THE LASHES ARE TOO LONG: The lashes will probably be too long also… so trim the length shorter –not too much – you can always go back. Point the end of the scissors downward into the top of the eyelashes and snip into the lash tips. Do not cut straight across in one swoop as you do not want an even cut…they look more natural when uneven.
Now apply eyelash glue on the clear strip part…I put a little glue on my vanity table then pick some up with a toothpick and place it on the strip part …you don’t need much. Some people squeeze the tube directly on the strip part…. (Whichever is most comfortable is fine.) Now with both hands holding the lash place it next to your own lashes. Use tweezers to adjust the lash next to your own lashes and to pull it to one side or the other if adjustment is needed. With tweezers you can also adjust the lash level upward or downward if need be. If you do this right away before the glue dries, it will be very easy to adjust. (You will have about a minute.)
After applying both false lashes, blend your natural lashes into them. You can do this with your fingers or a small eyelash or eyebrow brush. (On occasion I have been known to put a touch of glue on a spot between my own lashes and the false ones to keep a spot close together.)
HOW TO REMOVE: Hold the inside edge of the lash next to your nose, and gently, slowly, pull lash off toward your ear. If “stuck” put a drop of water on the stuck spot – wait a few seconds and pull it off.
HOW TO CLEAN: To clean false eyelashes, place them on a counter and put a few drops of water over them. After a minute or so the glue will be easy to pull off the clear strip with your fingers. Pull glue off lashes from the strip part of the lash and your lashes will last longer. (As opposed to pulling glue through the hair part of the lash) If the lashes are a little messed up, don’t worry; put them on your finger, lengthwise, and comb them out. Let dry and they will be ready to wear again. You can also place the lashes between tissues; wrap the tissue around a pencil and let dry or store.
-----------------------------------------------
Quick way to apply your favorite false lashes:
To begin, get all of your eyeshadow applied first. Once finished, curl your lashes if you feel you need to because if you try to do that afterward, you are going to pull them back off! Before you start, hold the lashes along you lashline and trim off any excess length. Now apply a very thin line of the glue and leave it to almost dry. When the glue is almost dry, push them back along the lashline until they touch the lid. Gently press them into place. Because the glue is nearly dry, they should adhere immediately. If you try to apply them while the glue is wet, they will slide all over the place and you will make a right mess out of it.
I find it helpful to buy lashes that are on a curved fibre. Practice before the big event so it is not traumatic on the big evening, and if it seems to be going wrong, scrap them before you get frustrated and ruin your night out.
-----------------------------------------------
How to Remove Fake Eyelashes
We all know that many are not fans of having to touch their eyes, but taking off your falsies with tweezers, , picking at them with your nails, or clamping and yanking with an eyelash curler can seriously damage your fake lashes. Here are some of the best ways to remove your lashes.
1. Wash your hands with antibacterial soap thoroughly
2. With your fingers grap the outer corner of your falsies between your forefinger and thumb and tug them off very gently. If you are using individual lash clusters, take them off section by section with your fingers. The key word here is gentle—you don't want to pull the real thing out alongside your false lashes!
3. With a cotton ball and some eye makeup remover, clean and remaining lash adhesive off your natural lashes. You may be tempted to pick at the stubborn glue clamps but avoid doing that. If you do you might end up pulling off some of your natural lashes.
How to Clean False Eyelashes
Many of us are used to just applying a couple coats of mascara over our false eyelashes because, hey, anything worth doing is worth doing right. But the problem with that is it can cause product build up which it's self can crease, break or become gunky looking , on top of that it can also lead to eye infection in some cases. Regardless we are pretty sure you got all the products you need to clean you false lashes in your medicine cabinet right now.
1. Start with cotton swabs, paper towels, and either rubbing alcohol or oil-free eye makeup remover.
2. Place the false lashes on a paper towel and douse the end of your cotton swab in alcohol or eye makeup remover, squeezing off any excess product.
3. Rub away adhesive and makeup gently away from your lashes using a cotton swab, giving the lash bands special attention since the can get pretty nasty.
4. Finish the makeup removal process by using another cotton swab dipped in warm water to clean off any remaining mascara. .
5. Never squeeze your false lashes dry after cleaning them! Let them air dry on a paper towel.
Invest in a spray bottle for your cleanser can help make life a little easier, according to Noël Jacoboni, a pro makeup artist in New York City.
"I would suggest placing the lashes on a clean, dry tissue and spraying with alcohol," Jacoboni says. "Granted, this doesn't work for all types of lashes but has a great return rate for me. This is mostly for synthetic fiber lashes and not natural fiber lashes. Make sure you know the difference!"
If you use double lashes or stacked lashes (i.e. Ardell Studio Effects) lashes with added volume then you really do not need an mascara added. If you plan on using mascara it is recommended to apply the mascara on your natural lashes before applying the falsies. When you're finished wearing them, gently remove glue with tweezers. Water and cleaning products will cause them to lose their shape.
Another good trick to cleaning your false lashes is to soak cotton pads in alcohol or makeup remover and gently press the lash strips between the pads to remove and dissolve the makeup. Once you get the makeup removed, gently press the lashes between two cotton pads soaked in clean warm water.
How to Remove Eyelash Glue
Once you are done cleaning off the mascara off your lashes there will be a small change that there still may be a few glue clumps stuck to the lash bands. Try not to scrub them off, rather you can use a pair of tweezers to try and pull them off.
Time to Store Them
Next time you buy a new pair of falsies, do not throw away the box. you can us it again to store and reshape your false lashes for the next time you will use them.
And remember, a used set of lashes is for your personal stash only. "Never bring a used pair of lashes to a professional or makeup counter to have them applied," Jacoboni says. "Re-use falsies is for personal application only. There's a risk of spreading eye infections to the professional. I never allow my clients to bring me used lashes for application. They need to buy a new pair every time."
Although it might sound funny to stand over your bathroom counter diligently swabbing a set of eyelashes, knowing how to clean your false eyelashes means that not only will they last longer, but the next time you wear them, it will be a lot easier to place the lash naturally on top of your real lash line without a bunch of gummy buildup. Nothing is worst then someone pointing to some flakes on your lashes and you having to explain that it's glue and not some weird eye dandruff.
-----------------------------------------------
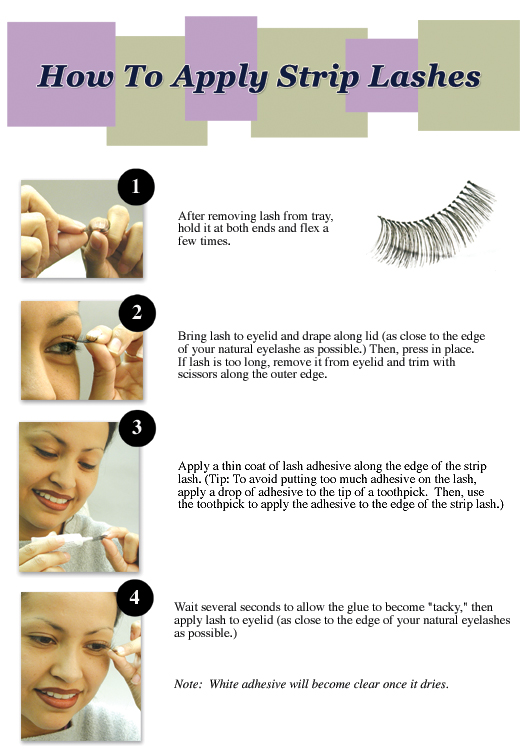
How to Apply Strip Lashes
1. After removing lash from tray, hold it at both ends and flex a few times.
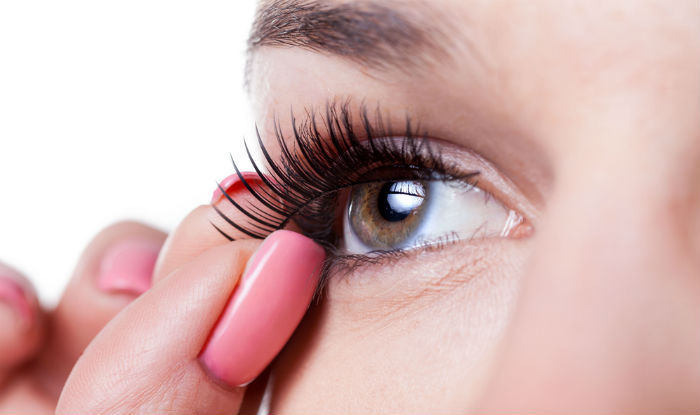
2. Bring lash to eyelid and drape along lid (as close to the
edge of your natural eyelash as possible). Then, press in
place. If lash is too long, remove it from eyelid and trim
with scissors along the outer edge.
3. Apply a thin coat of lash adhesive along the edge of the
strip lash. (Tip: To avoid putting too much adhesive on lash,
apply a drop of adhesive to the tip of a toothpick. Then,
use the edge of the strip lash.)
4. Wait several seconds to allow the glue to become "tacky",
then apply lash to eyelid (as close to the edge of your natural
eyelashes as possible).
Note: White adhesive will become clear once it dries.
-----------------------------------------------
How to put on false eyelashes easily
You have seen the heroines of the telenovelas or the divas in the Oscars. Their eyes sometimes are so expressive and their lashes seem so thick and large. The secret is at your reach for special occasions: false eye lashes, miradas de engaño.
They are not the typical lashes that your grand mom used to wear; the latest eyelashes are better. They look more natural and are easier to put on.
Step by step process: how to put false eyelashes?
Selecting the false eye lashes
You can purchase them in shops such as CVS and beauty stores.
A smaller selection is available in discount stores such as
Walmart and Target. A much larger selection is available online.
Step by step process: how to put false eyelashes?
Selecting the false eye lashes
You can purchase them in shops such as CVS and beauty stores.
A smaller selection is available in discount stores such as
Walmart and Target. A much larger selection is available online.
There are a few types of false eyelashes:
Hair type: artificial or natural. The synthetic ones are fine if it only for cosmetic purposes.
Full lashes and individual lashes. The full lashes are the ones your grand mom used to use. They are easier to use and convenient, but they may not give you a natural look, but a very dramatic one. The individual false lashes are more natural looking. They are used in the exterior corner of the eye and help to create more expressive and sexy eyes.
Color. If you want a natural look, try to use a similar color to your lashes with mascara. For Latinas, brown and black are the most appropriate. If you want a special look there are many options for eyelashes.
What will you need?
Eye lashes
Eye lashes glue
Tweezers
A toothpick
Generally speaking each package of fake lashes has its own instructions. In the following page you will find general instructions and a few makeup artist tips.
Step by Step Instructions
Review the length of the lashes, put them close to your natural eyelashes and determine what length is better, and then trim them with scissors.
Clean your face and eyes. Apply your foundation and concealer. Try not to apply any grease on the eyelashes line, because the grease will make it more difficult for the glue to work.
You need to be in front of a mirror, preferably a magnifier mirror. Make sure you have everything you may need handy.
Apply the glue in the places where you want to put the lashes. Use only a little bit; if you need more, you can always put more. If you put too much glue, this maybe visible. Follow the glue instructions; it may require you to wait a few seconds. Try not to apply the glue directly over your own eyelashes because you may damage them. And of course, be careful not to put glue in your eyes.
Apply the fake eyelashes directly over your own eyelashes. You may push with the tweezer or the toothpick. Be careful not to pinch your eyes.
If you are using individual eyelashes in the corner of your eye follow the same instruction only in this area. You may use clusters of 2 or 3 lashes.
Apply your eye make up as usual. Most people do not apply mascara over the fake eyelashes, but if you wish you may do it.
Makeup artist tips:
If you use eyeliner on the eyelid, apply it before you put on the eyelashes, directly on your eyelash line.
If you curve you eyelashes, do it before applying the fake eyelashes; it is easier that way.
If your natural eyelashes are not dark, you may apply mascara before the fake eyelashes in a color that matches the artificial eyelashes' color.
Taking them off
1- If you use waterproof glue, use a special remover for this type of glue. Otherwise, you may use warm water and your regular eye makeup remover.
2- Be careful when you pull the fake eyelashes off so you do not pull your natural eyelashes too. You may use the tweezers to take them off.
3- Once you have taken them off, follow the package instructions to store them.
4- Do not ever sleep with fake eyelashes because you may damage your eyes or cause infection.
5- To perfectly apply the fake eyelashes takes experience and patience. Do not expect perfection the first time. Now you know how the celebrities get those gorgeous lashes and now you can have them too.
-----------------------------------------
Use of DUO Eyelash Adhesive for easy false eyelash application.
It's a top choice, that's why this adhesive is a very great seller in the false lashes market.
You have to use this to wear full or half lashes for a perfect hold.Holds better then any other glue I have used.
Start by holding the tube upright and push out a small bubble. Then add to the tip of the applicator and slowly apply to the band of the lash and drag it across the band. Make sure that the amount of glue is about as thick as the band its self. When apply properly, your false lashes will last all day and night. DUO Adhesive dries well and it dries clear. For those looking for an added eyeliner effect, choose dark tone adhesive.
Let the glue dry to a tackyness by holding the lash from its ends and not the band itself for 10-20 seconds and that's it all done! Now you got perfect hold for all day. This glue goes with me everywhere since I'm always wearing falsies. At times the corner of lash band will start to lift a bit after 8 hrs of use, so with something like a toothpick I just add a bit more glue on the lifted edge, wait a bit press the lash band back to the eyelid and perfection again :)
See gallery of lashes HERE