
Anyone who’s ever tried to glue a strip of (or worse, individual) lashes to their eyes knows it’s anything but simple. Best case scenario? You don’t glue the lashes to your fingers or your fingers to your eye. But you constantly run the risk of them shifting all over the place with each blink or falling off completely thanks to your wholehearted yet shoddy glue attempts. Not to mention, isn’t putting glue so close to your eyeball dangerous or something?
I always had it in my mind that I will always have stubby, sparse eyelashes. To my surprise I heard about these new magnetic false eyelashes and couldn’t help myself from trying them out.
Have you heard of the new buzz? It’s Magnetic lashes, and they are taking the industry by storm! These new magnetic lashes are ridiculously easy to apply. Also a big plus for these new falsies is that they don’t damage your natural lashes. Magnetic lashes are mentioned in Allure Magazine as one of 2016’s “Best of Beauty Breakthrough” products. When world famous Ardell brand came out with their own version after their best selling styles, we were super happy! If you had issues with the conventional glue on falsies like allergy etc then these falsies are for you.

I love false lashes! I have been in about every eyelash situation you can imagine; drugstore brands like Andrea “Curl 91 style and Ardell’s “Wispy” model were the gateway products that ignited my lash habit. These days, my habit now involves feeding my lashes daily with Ardell Lash and Brow Accelerator to promote growth and, when time permits, getting eyelash extensions for $120 a set.
Eyelash Extensions can last about three to four weeks with monthly refill appointment upkeeps which can be time consuming and costly. Preserving your lashes means being conscious never to rub your eyes, avoiding certain types of face cleansers and even the water in the shower hitting your face directly, since it can dislodge the delicately glued-on hairs. Don’t get me wrong; they look beautiful, but it’s a process.

If you’re a lash-aholic like me, then magnetic lashes are the clean and economical answer to get your lash fix on and poppin’. Magnetic lashes apparently appeared on the beauty scene about a year ago. To be honest, I thought it sounded too good to be true. First of all, what!? Magnetic eyelashes!? Second of all, if the magnets were too strong, wouldn’t they pull my real eyelashes off eventually? If they weren’t strong enough, wouldn’t they fall off?
I decided to some magnetic lashes for myself and put them to the test.
“Here’s how they work: Basically, it’s an eyelash sandwich!”
The box I ordered included four strips of lashes with teeny, tiny magnets attached to the ends of the strips. When one strip is placed on the upper lash and the other placed underneath, they magnetically attract one another and clamp shut. Sounds simple, right?
Yes, in principle; but in practice, they are a bear to put on correctly. And you have to practice …
First, do your mascara, because you can’t put mascara on the magnetic lashes if you want them to last. Then put down a piece of paper towel to prevent losing the lashes if you drop one—handling the lashes reminded me of being a kid trying to hold a crawly insect.
Oddly, the lash strip is as straight as an arrow; I don’t know what that’s about, since last time I checked, we all have curved lids. So you need to take the lashes and bend them back and forth in a U shape to form the curve to fit them to your eye. Next step: Cut the lashes in half; the straightness of the strip only allows them to work on the outer corners of your lashes. But there’s a beauty hack that we’ll get to later …
The upper and lower magnets are usually two different colors to help the wearer differentiate them, unless you have some cheapies; then you’ll know you mixed up the lashes if they start to repel instead of attract when you try to apply them. Once you’re trimmed up and ready to go, then comes the delicate task of getting them mounted on your own lash line.
The upper lash goes on in a second; just line it up with the corner of your lashes and then look down as you lay it on top of them. Then comes the tricky part: Fit the lower lash in the identical position underneath the upper lash. Girl! It took me 20 tries!
When you close your eye to attach the lower lash, “May the force be with you” is all I can say. The magnets cause the bottom lash to move like a slinky and stand up like a caterpillar. For me, both lashes ended up stuck together over my own lash; without your own lashes to hold the magnetic ones in place, both lashes come off like two kids going down a slide.
Warning! Do not try to pull or peel off the magnetic lashes as you would a glue on strip lash. You will snatch your eyes bald! I figured that one out the hard way and lost more than a few hairs from both sets of my real and fake lashes because the magnetic lashes are sandwiching your real lashes. It’s best if you slide the lashes horizontally and gently toward the outer corners of your eyes to remove them.
And yes, I tried to use tweezers. However, the magnets stick the lashes to metal tweezers. Then I remembered my fab plastic eyelash tweezers from my drugstore lash kit and seized them to continue my attack. OK, major help on getting the lashes not to stick to one another, but I was still not mastering getting them flush against the lash line. They were kind of halfway on, halfway off, and like a weave weeks overdue for a tightening, they showed a visible track across the middle of my lashes. Not cute. Not cute at all.
But I wanted this: the promise of no glue and no waste—because you can reuse the magnetic lashes indefinitely instead of throwing them away after one or two uses. Plus, the thought of escaping the expense and maintenance of eyelash extensions kept me going.
Finally, I worked it out that I could look down, put on the upper lash over my natural lashes, then look all the way up to apply the bottom lash. The advantage of having really curly hair is that curly lashes make a cradle for the top lashes to hold them in place. Voilà! I got it.

Stephen Lovekin/Getty Images
How do they feel? Light as a feather, but still as if you have a little something on your eyes. It’s the slight sensation of something touching the waterline of the upper lid, as though an eyelash is out of place, but not irritating or painful. Sort of like wearing contacts or strip lashes, the sensation goes away in a few moments.
The magnets wear as well as the glue-on fake lashes; I wouldn’t go swimming with them on. The magnet will hold but drenching your falsies in water is never a good idea and will make your false eyelashes limp and loose shape. Magnetic lashes do just fine in strenuous workout. Just had to be careful not to push the lashes out of place when wiping the sweat off during workout with your hand or towel.
The drawback for magnetic lashes is that as of right now, they only come in sets that work on the outer corners of your own lashes, so you still have to wear mascara. It’s just not just a pop-’em-on-and-be-Insta-fab situation. But there are some hacks, if you’re looking to do a DIY full-strip lash and skip the mascara and the glue:
Buy a full-strip lash that you really like a lot, since you’ll be reusing them, and any magnetic set of lashes. You simply trim the strip lash and the magnetic lashes to fit your eyelids and then position the magnetic lashes on the outer corners of the strip lash in the same position as you would on your eyes.
Using lash glue—I like Kiss Lash Glue with Aloe—adhere the magnetic strip to the bottom. If the glue you’re using doesn’t come with a brush, use the tip of the handle of a small makeup brush to carefully spread the glue along the edge of the two lash strips. Taking extra care to make sure the magnetic lash is on the bottom, glue the two strips together. Instant upgrade!
Magnetic lashes do take a little time to master on their own. When you get the application right, they look impressive and your sense of achievement is off the scale. But you need to be prepared for some frustration when they refuse to sit close to your lash line or one lash plops off before you can clip it magnetically to its partner.
Saying that, practice, practice and practice! You would WANT to master them because they’re such a clever idea.
Available styles:
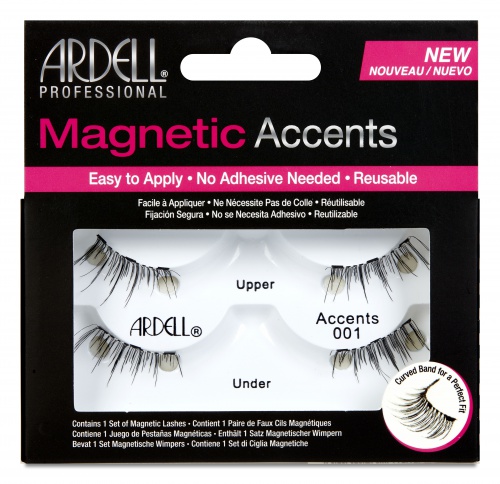
Ardell Magnetic Lash Accents #001
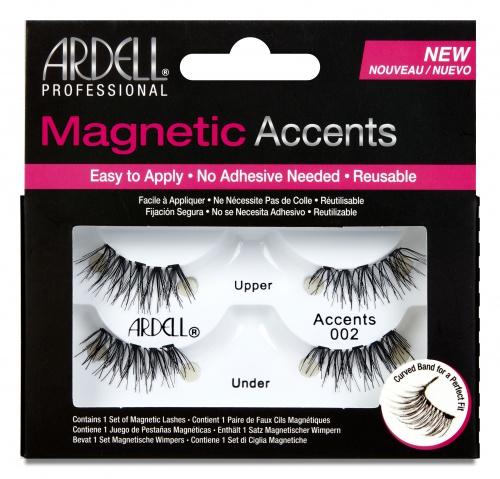
Ardell Magnetic Lash Accents #002
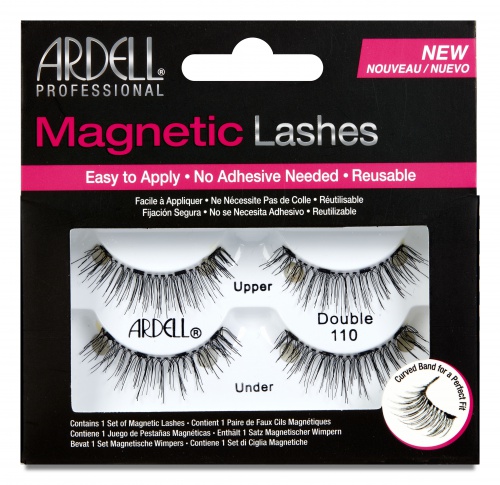
Ardell Magnetic Lash Double #110
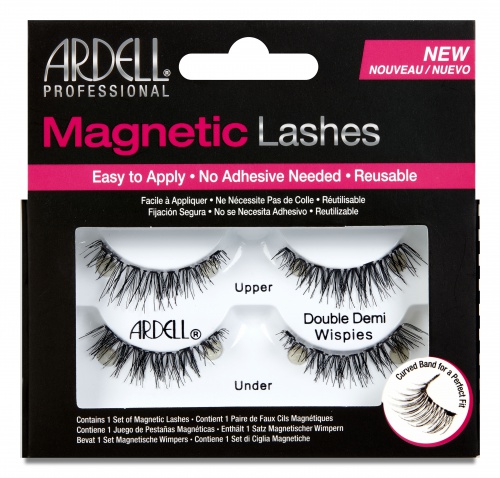
Ardell Magnetic Lash Double Demi Wispies
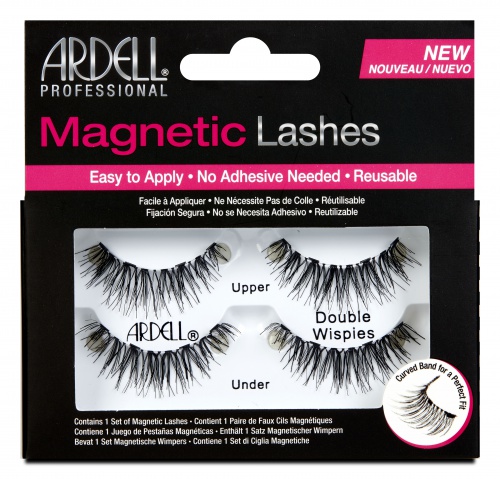
Ardell Magnetic Lash Double Wispies
There are step by step tutorials on how to apply magnetic lashes.
1. Practice first! Don’t wait until the day you want to wear them to give them a try. Learn to master on how to apply these on a normal day.
2. Curl your natural lashes, then apply mascara. Let the mascara dry before applying the lashes. push the lashes out of place. Mascara helps the magnetic lashes blend into your own lashes. We found the effect looked best combined with smoky eye makeup, partly because it’s a dramatic look, and partly because dark makeup disguises the lash and magnet strip.
3. Bend the lashes, making them more curved so they fit nicely onto your lashline.
4. To apply Ardell Magnetic Lashes, simply treat the two ultra-lightweight fiber strips like a sandwich — place the top lash first on your top lashes, then place the bottom lash (marked with a red dot) under your lashes.
5. Let the magnets do the work, and click together into place. BOOM! Easy false lashes in two seconds!
6. Remove them by gently and slowly shifting them apart, without pulling.
Bonus tips: For an easy and quick everyday look, apply one set of the “original” lashes on each eye. To up the drama, apply two sets of the “original” lashes on each eye, laying them out side by side. For the most dramatic impact, go for the “bold” lashes for the most voluminous eyelash look.
The best part is that I have found they don’t damage my natural lashes when applied correctly. It’s an easy way to create a dramatic lash line in just seconds. You can even skip mascara if you want, and forget about messy glue that takes ages to dry. This is saving me time, and also money – I used to spend a fortune in single-lash extensions — lliterally hundreds of dollars a month for several months in a row until I was fed up with the whole two-hours-long application process every 2-3 weeks. Then I tried to save money by doing lash extensions on myself at home, but I always ended up ripping out my eyelashes whenever I removed them.
Lately I’ve been trying to grow my lashes with a serum, which is fine, but as a beauty blogger and a YouTuber, I want a more luscious lash look instantly for photos and videos and these magnetic lashes gives me that look.
Check them out, and see what you’re attracted to! You can purchase Ardell Magnetic Lashes at MadameMadeline.com. It’s time for us all to upgrade our lash game!
Related Article:
Game-Changing False Eyelashes Don’t Require Any Glue At All
Source: yourtango.com

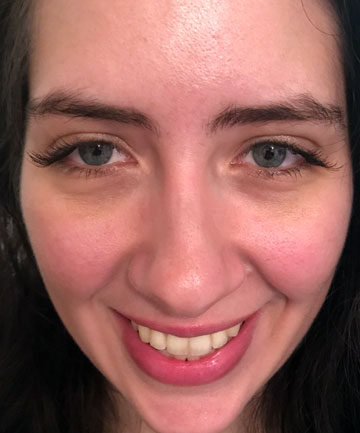
I can dress up my eyes all I want with eyeshadow and liner (well technically I can’t, because I’m not good at that — but that’s a story for another day), but nothing really gives that oomph effect quite like false lashes do.

Here, I have the lashes on one eye and the difference is so striking I’m confident I don’t even need to point out which is which.

The best part is they were so incredibly easy to put on. Once you get the top lash where you want it, you simply line up the bottom lash and it clicks right into place.

Check them out! You can score them starting in January for $14 at your local beauty retailers like Target, Walmart, or online at www.MadameMadeline.com
Related Article:
Are Magnetic Lashes Worth It? We Tried Them and Here’s What We Thought
Source: TotalBeauty.com

Although I’m pretty low-key when it comes to my everyday makeup routine, I almost never leave the house without applying mascara first. I’m lucky that my lashes are pretty lengthy on their own, but I like a little extra curl and volume (my fave mascara of the moment is Benefit Roller Lash Curling Mascara, $24). My blue eyes are my favorite feature, so I like to draw attention to them.
There are times when I do want to amp up the drama (like for all the weddings I have coming up in 2018) and I know that false lashes are the only way to get me there. Yet despite being a beauty editor, I’m basically clueless in this area. That’s why I was so excited when I learned that magnetic falsies existed. They seem so easy! Could this be the solution to all my past fake lash fails? I put magnetic lashes to the test to find out.
Why I Decided to Try Magnetic Lashes I’ve never been able to master false lashes, no matter how many times I’ve tried. The strips are always too big, the lashes never seem to actually stick and the removal process is a total nightmare (seriously, I’ve rubbed my skin raw trying to get off false lashes — that had been applied by a makeup artist). Since I’ve had virtually no luck applying falsies on my own, I had basically given up on them and relied solely on mascara to pump up my lash game. While I know my way around a mascara wand pretty damn well, there are only so many coats you can apply before your lashes start looking clumpy. Hence the need for falsies.
After hearing a fellow beauty editor rave about how easy it was to apply magnetic lashes, I knew I had to take a pair for a whirl. To be honest, I was a little intimidated but I still figured that this would be easier than the regular ol’ falsies
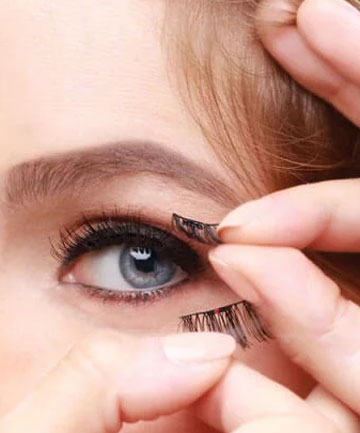
How They Work Traditional false lashes come with a strip that sits atop your upper lash line. Ardell Magnetic Lashes are different. These come with a magnetized strip that goes above your lash line as well as magnetized pieces that go under your lashes. The pieces on top and below connect, cushioning your lashes in between. There’s no annoying glue and waiting for your falsies to dry. The strips are designed to fit any eye shape, so you don’t have to worry about cutting them down to size. I tried the original style (in both full and half) but there are three others (enhanced lash, bold lash and extra bold lash). You have the option to apply them by hand or with a little applicator tool that comes with a set.

My First Try. As you’re now well aware, I am not very handy with fake fringe and my first few attempts using magnetic lashes didn’t end in success. I started with the full lash set, which I applied by hand. I set the full lash strip as close to my upper lash line over my right eye as I could, holding it in place with my left hand. With my right hand, I picked up the tiny bottom piece and placed it under my natural lashes so that it would connect with the magnet. I finished by picking up the second tiny bottom strip and connecting it to the magnet closer to the inner corner of my eye. It took me about 15 minutes of playing around to get one eye done.
Take Two I actually found applying the half set of magnetic lashes a lot easier, since I only had two pieces to work with, not three. I decided to try my hand with the applicator tool this round. I placed the lashes on the tool and gently pressed it into my lash line. I had to play around a few times to get the placement right, but it only took me about five minutes per eye. Not so bad!
The ResultsI really like how the half lashes looked. I wore them out to a holiday party and they stayed on throughout the night. They were so comfortable, I forgot I was wearing them! Plus, the lashes were really easy to remove. All I had to do was gently slide the two magnets away from each other. The fact that I didn’t have to scrub my face with makeup remover to take them off was huge for m
Would I Use Magnetic Lashes Again?I would definitely wear magnetic lashes again. Although it took some practice to apply the magnetic lashes just right, I found the process easier than traditional falsies overall (no glue and no having to snip the lashes were major pros for me). Not to mention, removing them was way easier. What can I say, I might just be a fake lash convert after all.
Related Article:
These Magnetic Lashes Are Super Pretty and a Total Time-Saver
source: allure.com
I like to think of myself as well-versed in makeup techniques; I’ve mastered the cat eye (thanks, Kat Von D) I’m nifty with nail art (dotting tools all the way), and I’ve made smoky eyes my bitch (mostly). But when it comes to applying false lashes, I’m a total goner. And, based on the number of YouTube tutorials on the subject, I’m not the only one with the dexterity of a drunk sea otter. If you’re like me, you probably flipped when Ardell launched their own magnetic lashes this month. No glue, no struggle, right?
First, I tried the full strip Magnetic Double Demi Wispies. They come with what looks like two sets of strip lashes but is really just one set (each eye requires a top and a bottom for the whole magnet thing to work). The goal, essentially, is to make a lash sandwich — where your natural lashes are the filling and the magnetic lashes are the bread, if you will.
As per the directions, I began by placing the top portion on my lash line (in the same way you’d apply a conventional lash). I immediately had trouble getting as close to the lash line as I knew I should (this is also a problem I have with conventional strip lashes). When I finally aligned the top portion as flush to my lash line as I could, I shimmied the bottom portion underneath my natural lashes and prayed it would make contact with the top lashes… to no avail. After fumbling for nearly five minutes I was able to create a passable lash look.
The only problem? The lashes were too long for my eye and I wanted to shorten them. One major downside of magnetic strip lashes is that you can’t cut them to size, lest you disturb the strategically-placed magnets that hold the whole thing together. That said, if you’ve never had issues with lash strip length, you’re probably fine with these. Personally, I wished I could’ve trimmed them down to size for a more realistic look. Nevertheless, I was extremely happy not to have glue all over my fingers and in my eyes by the end of the application.

Hoping for a more believable-looking result, I whipped out the Ardell Magnetic Accent Lashes in 002. These look like your typical Ardell half-sies, but of course, they’re magnetized. Placing these babies right on top of my lash line was easy peasy, mostly because a half lash means less…stuff to deal with. Top portion in place, I positioned the bottom portion underneath my natural lashes, and it was honestly as if the heavens had aligned. I blinked in the mirror and the girl blinking back had long, luscious lashes!

I’ll admit it: I was incredulous. These had been so easy to apply and they worked. Granted, my struggle with the full strip set may have given me some practice, but by golly, these accent lashes took less time than mascara and looked ten times as dramatic. In my book, that’s a literal game-changer. I think it’ll still take me a bit of practice to get 100 percent perfect results with these, but they paint an incredibly hopeful future for those of us who are lash-challenged.
Related Article:
Four women tried magnetic false eyelashes for the first time, here’s what happened…
The results were… interesting.
Will you try magnetic eyelashes?