
The world of beauty has many intimidating things. False eyelashes is certainly one of them. However, they are also geniuses at adding a layer of subtle glamour to your eyes. Although at times they are not the easiest to apply we do have a list of some mistakes you should try to avoid to make the process easier for you.
Mistake #1: Not Perusing Options
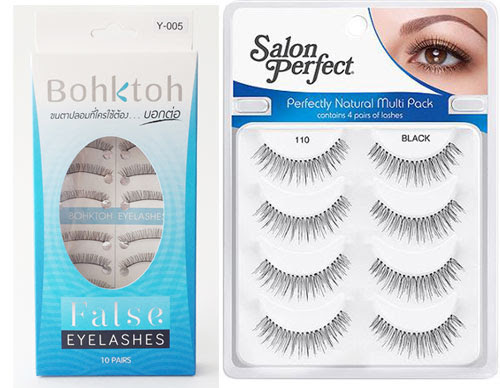
Contrary to popular belief, you have so many options when it comes to falsies! In the broadest sense, you can pick between lash strips and individual lashes. Whilst the former are easier to work with, the latter provide a more natural look. Once you’ve chosen the type you want, you have further options with regards to the length, finish and colour. Some brands even offer different lashes depending on the shape of your eyes.


Mistake #2: Doing Your Eye Makeup After
Keep in mind that false lashes are a commitment. You’re going to need some make up to go along with your lashes if you plan on showing them off. . Before you start the application, finish using your eye liner and shadow. We recommend going a little thick with the liner if you are using a lash strip, as it will be easier to mask the band with the liner. Many makeup artists would rather use mascara after applying lashes but for us we find that the lashes stick a bit better on to mascara specifically individual lashes.
Mistake #3: Skipping The Customization
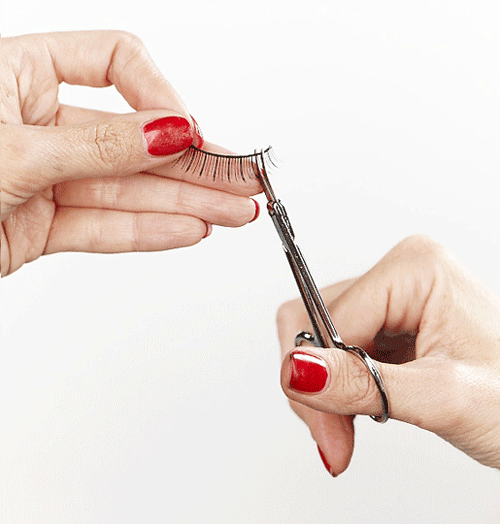
Although you may think that you have found the perfect falsie for your eye shape and color , the truth is you will still need to customize them. To ensure that your falsies aren’t too obvious, you need to snip them to the correct size. Place them along your upper lid to see how much you need to take off. Go ahead and cut off the excess lash from the inner corner. Try and leave the outer edge alone since those are usually flared a bit.
We usually recommend choosing a variety of lengths when it comes to individual lashes so that you can find the right one for you with the most natural look. you can use the long and medium ones for the outer corners and use the short ones for the middle and inner edges.
Mistake #4: Using Too Much Glue
You don’t need a lot of adhesive, actually the less you use the better! If you use too much, you will be left with a thick, visible mess that will be hard to hide. For best results, use a brush to stroke the glue on the band. If you have opted for individual lashes, dip each one into the tiniest amount of glue before putting it on. Make sure you give the adhesive a few seconds for it to become tacky and make adhesion better.

Mistake #5: Sticking All At Once
Next is the actual application! In the case of lash strips, do not set out to stick the entire band at once. First, tilt your head back so that you can see your upper lash line. Then, press the band along the centre part of your lid first. Once it’s in position, you can adjust the rest of the strip into place. If you don’t want your lashes to annoy you every time you blink, make sure not to put them too close to your inner corners. At this point if your lashes don’t look like they are on right you still have time to fix them. Be care full and pull on the lash but don’t pull them off completely. then don’t touch them until the adhesive dries.
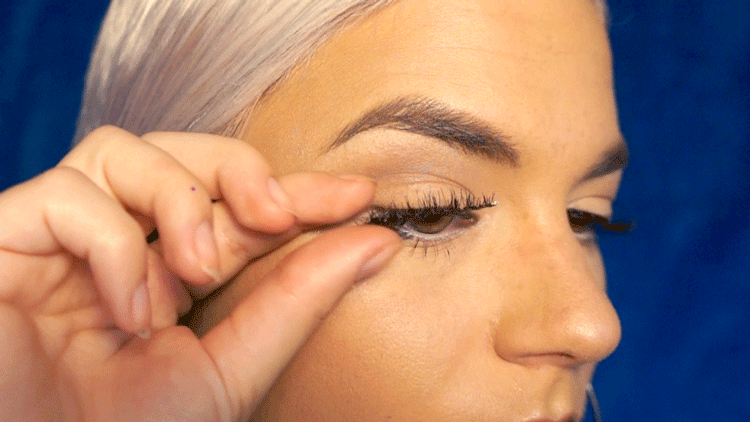
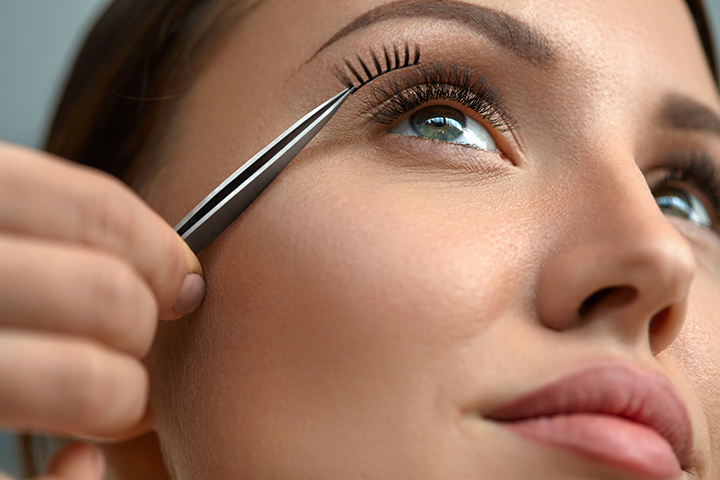
You will need to be more careful when it comes to individual lashes. To place them, you can either use your fingers or a tweezer. Stabilize your arm on a desk and then add each lash to the gaps between your natural lashes. start by placing the individual lashes from the outer edge and continue adding lashes along the lash line until you are completely satisfied with your look. Make sure to hold each lash in position for a few seconds before moving on to the next one. Straiten them in to place before the glue dries as needed.
Brush your lashes to blend them in with your natural lashes.
Coat them with a bit of mascara to get a seamless natural look.
We’d love to see your rocking false lashes!

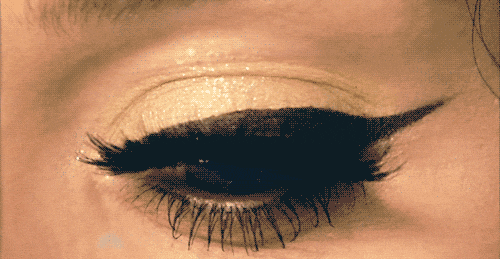
Get smokey eyes
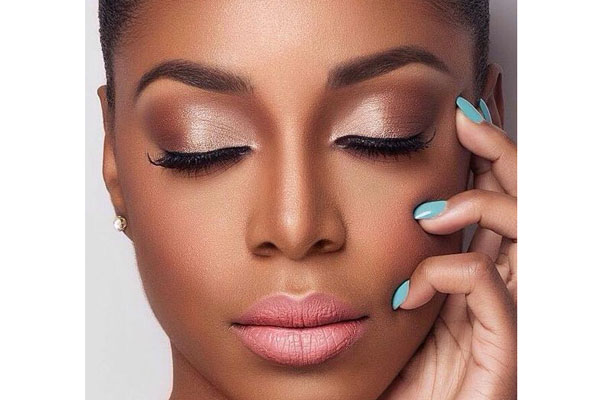
Smokey eyes should not have harsh lines. COURTESY PHOTO
Applying your makeup right is a very important step to achieve the desired results. Laura Mercier, a celebrity makeup artist in the US once said, “Your eye makeup says so much about you and your style.” Here we will check out a few eye makeup techniques and also tips on how to keep your eyes healthy.
To get smokey eyes you will need the following as per Daphine Tukamushaba a makeup artist from ILove studio. Eyeshadow brushes, black liner, mascara, black eyeshadow, primer and concealer. Make sure your base is clean. First you will apply primer on your eyelids which will help your makeup stay on longer and make it easier to blend eyeshadows.
Use concealer on your eye lids and under your eyes. This will help you even out discoloration. If you want to avoid concealer settling in to the creases on top of the area under your eyes, use a creamy concealer.
After blending on concealer, use a large fluffy brush to tap translucent powder or call it your transition shade on the under eye area. This is great for catching any loos particles while applying eyeshadow. Don’t use too much as you only really need just a tiny bit of eyeshadow. It is important to blend it in large circular motions for a blown out smokey eye effect.
Use a more tapered brush to add a darker shade; shimmery brown, navy, gray, plum, or forest green tend to work best as they are less harsh compared to solid black and will be much easier to blend out. They also add a sexy element of surprise to your look.
Tip: Using a smaller, more tapered brush will give you more control and definition.
Smokey eyes should not have harsh lines. Sweep your brush in your chosen shade and tap off any excess before gently blending the darker shade underneath the transition shade.
For a dramatic smokey eye, take the darker shade right onto the crease of your eye and smudge a black kohl liner along the lash line.
Tukamushaba adds that you should take your time and use a small amount of product as it can be difficult to work with much shadow, especially when it is dark.
Also, always create your smokey eye before your face makeup such as foundation and concealer in case it smurges onto your cheeks.
Finally, she says, for perfect smokey eyes, blend, blend, blend.
Applying false lashes
It can be tricky, applying these lashes despite them looking perfect in the packet. With that, Elizabeth Mbabali of Izzy&Co Salon advises, “Select from a choice of individual lashes or strip lashes. Individual lashes give a more natural and customizable look whereas strip lashes give a volumised or winged look.”
However, there is no one-size-fits-all, thus the need to find the ideal lash type for your eye shape:
Deep-set eyes; with eyes set deeper into the head creating an illusion of a more prominent brow bone, try lashes that are longer in length at the centre of the lashes.
Downturned eyes; when the outer corners of your eyes appear to be drawing downwards, a shorter strip lash that is longer in the outer corners to lift your eyes is great.
Hooded eyes; when the crease on your eyelid is not visible, go for a thin strip lash in a shorter length.
Prominent eyes; when your eyelids appear projected in the eye socket area, balance your top lashes with strip lashes on the bottom, to give the illusion of pushing back your eyes. Then, apply mascara onto your lashes to help the natural lashes blend with the false ones. Measure the desired length and trim off any excess from the outer side.
Wrap the false lashes to give them a natural curl. Apply a thin layer of lash glue onto the edge of the lashes and allow it to dry a little
Tip: I find it easier to apply the glue to my own lash edge then apply to the false lashes.
Place the lashes as close to the eyelids as possible and press your lashes and the false ones with tweezers.
Health issues with eye makeup
“The eye is vulnerable to infection; the more you touch them, the more likely it is to be infected,” Mbabali continues, “Therefore, applying makeup to your eyelids daily, particularly, if the kit is not clean or expired, can lead to eye problems.”
Mascara: Soot particles in mascara can block the small oil producing pores along the length of the eyelid margin. This is the commonest cause of red eyes, dry eyes and irritated eyes.
Dirty brushes: Makeup brushes gather bacteria and dirt over time, introducing germs in your eyes. Wash them regularly to avoid infection.
Sharing makeup: Sharing your makeup kit is a recipe for cross infection. You would never share a toothbrush, so why share your eye makeup items?
Misty eyes; how to achieve them
“Misty eyes may not be far from smokey eyes,”Tukamushaba explains, “but the difference is that misty is really faded while smokey is quite dark at the edges.” So, the difference comes in the amount of dark shade used.
it could be smokey black, brown, pink, or blue; misty eyes simply mean blended out dark edges.”

Brooklyn Johnson
I like your tip about how you shouldn’t use much glue when applying fake eyelashes because if you use too much, you will be left with a thick, visible mess that will be hard to hide. I have never applied fake eyelashes before, but I’m a bridesmaid in my best friend’s wedding in a few weeks, and she wants us all to wear them, but I have no idea how to put them on. I will definitely utilize your great tips and tricks when trying to properly apply false lashes for my friend’s wedding!
Keith Povich
I am always applying eye lashes in wrong way and your post help me a lot. Keep sharing this kinds of blogs more.
Keith Povich
I am always applying eye lashes in wrong way but when i have gown through your post then i had learnt a right way of using this. Keep sharing this kinds of blogs more.
Keith Povich
Removing eyelash extensions properly can be just as important as putting them on in the first place but i am always face problem to apply this. Your post help me in applying eye lashes in right way
Iqra khan
This post is lovely to me because it funny for me reading my mistake and i exactly make same mistakes so i kinda relate to this alot which is my this post kept me engaged Love it.